We are reader-supported, earning a commission when you purchase through our links. There’s no extra cost to you. Thanks for your support! Full disclosure here.
With the current increase of solopreneurs and independent contractors, having a professional email address from Google Workspace (formerly G Suite) for your business or organization couldn’t come at a better time. It’s also a comprehensive solution for organizations with many employees that need a solution for email management and online collaboration.
The process is of setting up a Google Workspace account to send and receive emails using a professional email address is simple. Once you’re done, you won’t have to worry about using a personal email address when corresponding with business contacts. This one easy upgrade allows you to represent your business or organization in a more professional manner.
The Importance of Having a Professional Email
A professional email address is one that uses the website domain name of your business or organization. For example, if your website is www.example.com, then your professional email address would be yourname@example.com. Using this over your personal email makes you appear more legitimate and credible to your contacts.
Plus, while work-life balance blends more than ever, creating a separation between personal and professional accounts is paramount and eliminates room for error.
Luckily, setting up a professional email for your business is an easy process made easier with the Google Workspace set-up wizard. Designed with step-by-step guidance, the process can be completed in minutes.
Setting Up Your Google Workspace Email
We will now outline the step-by-step process for creating your professional email using Google Workspace. If you follow these steps, you can have your email secure and operational within the hour. You may even find a few other Google Workspace tools that you didn’t realize you needed as well.
There are four set-up processes you must complete.
- Google Workspace account set-up
- Add your domain, or purchase one from Google
- Domain verification and TXT record set-up
- Add MX records for your domain host
Step 1: Google Workspace account set-up
Begin by setting up a Google Workspace account. Once you click the “Get Started” link at Google Workspace, you’ll be prompted to answer questions to determine what service level you require.
First, enter the number of employees you have.
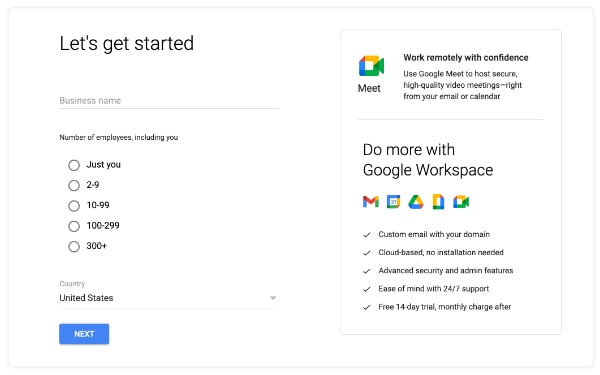
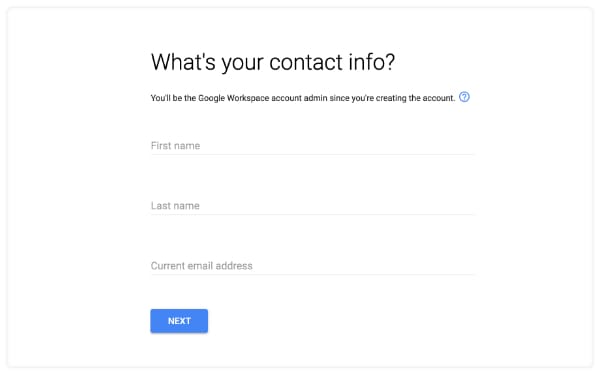
Then enter your contact information or that of whoever will be the administrator of the account.
Step 2: Add your domain, or purchase one from Google
You’ll be asked if you already have a domain name. Your domain name does not need to be connected to a website to create a professional email.
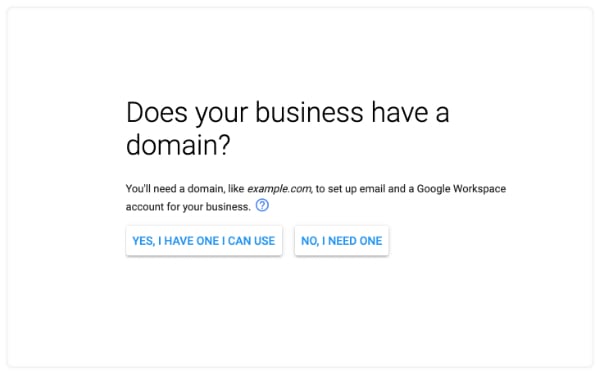
You can purchase domain names via domain hosts. They enable you to own the name of your website or email and show it on the world wide web. Examples of domain hosts where you can purchase names are GoDaddy and Bluehost.
If you do not have a domain name, you’ll have the option to buy one from Google and to enter the name you’d like.
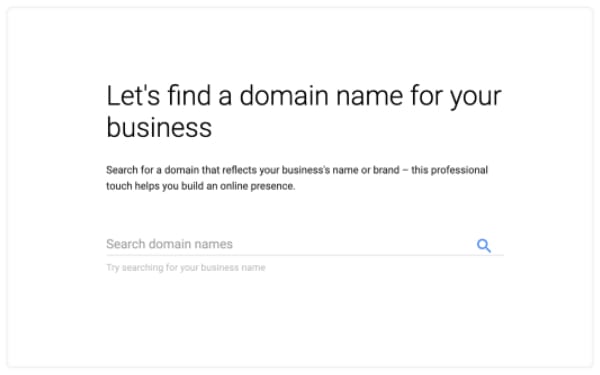
If you choose to purchase one from Google, they will propose a list of possible alternative names as well as the one you selected, if it’s available. You might have to get creative at this step, but make sure your domain name is relevant to your company or business.
Choosing your domain name is not something that should be taken lightly or done without thought. This is the professional name that anyone you correspond with will see, so take the time to ensure it’s appropriate, helpful, clear, and professional.
Once you have your domain name, you’ll be asked to enter it and verify that it’s the domain you’d like to associate with your professional email.
Now that you have your Google Workspace set up and your domain name associated with your account, it is time to enter a secondary, personal email address that you already use.
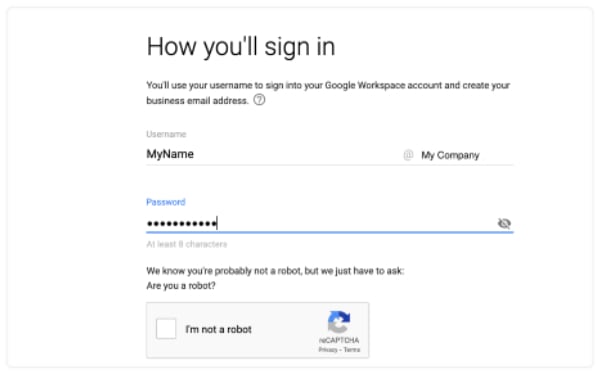
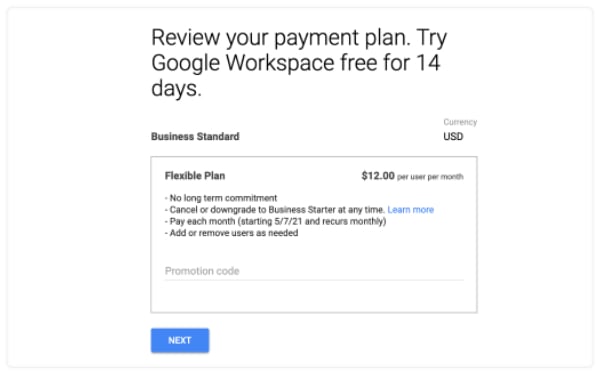
You’ll then need to review your monthly plan – which is free for 14 days – and complete your billing information. You may cancel your plan at any time.
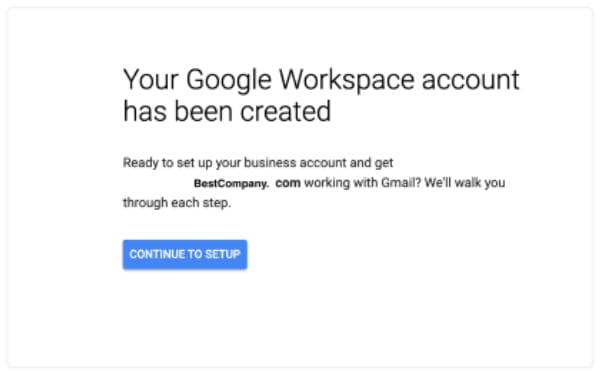
Once you complete these steps, your Google Workspace account will be ready to go.
Step 3: Domain verification and add employees, if any
You’ll now need to verify your domain name with your domain host to make the connection with your Google Workspace account.
The next few steps require some basic domain navigation know-how, but the Google wizard makes the process very easy for anyone to follow.
First, you’ll have to add a TXT record on your domain host site. A TXT record is an identifying record that will connect Google and your domain host. This verifies to Google that you own the site you’re registering with them.
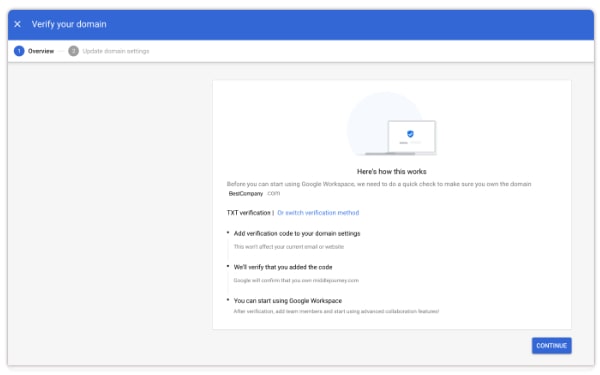
There are other verification methods. For example, you could add HTML code snippets to your website header or FTP server if you’re proficient with those methods. Google will provide instructions for those as well. Otherwise, go with Google’s recommended TXT record verification method.
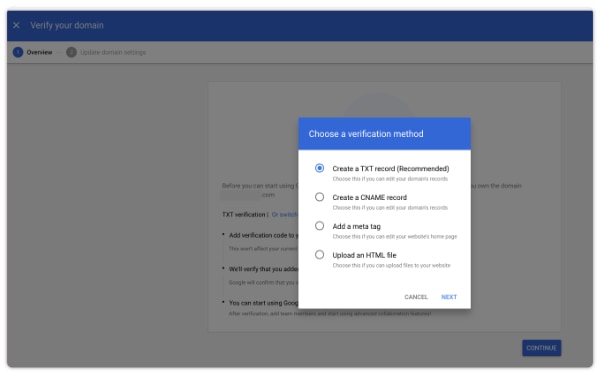
Google will automatically recognize which domain host you use and will provide easy-to-follow instructions for adding the record. This process starts with copying the code that Google provides.
Once you’re on your domain host website, Google shows you exactly where to insert the code they have provided.
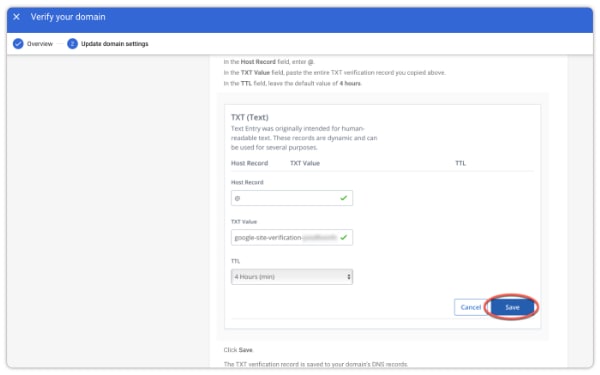
After you’ve saved the TXT record, which could take up to 60 minutes to activate, you’re ready to move on to adding additional email addresses to your account.
If you have employees or other users you’d like to have an email with your domain name, you can add them at this stage. Alternatively, you might want to set up a contact email, support email, or even a sales email. Many organizations have different emails assigned to various aspects of your business such as human resources, billing, or many others. It helps to classify the email before you even open it. Each user can have up to 30 email addresses, so each of these additional accounts could be assigned to the same person. This step is non-compulsory, and you can always come back to it later.
Step 4: Add MX Records with Your Domain Host to Reroute Email
The MX (Mail Exchange) record stipulates the mail server accountable for accepting email messages for a domain name. This is the traffic cop that essentially tells your emails to go to your Google server for routing. If you’ve registered your domain name with Google, you’ll be able to skip this step.
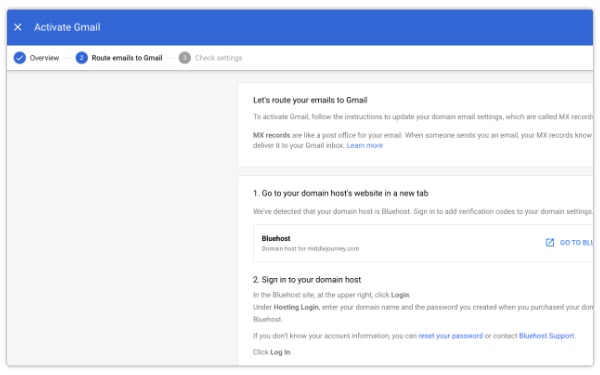
At this point, you’ll have to go back to your domain host and locate your DNS Records tab. This Domain Name System record translates your domain into a code called the IP address to point devices toward the correct path.
Again, Google has a help wizard for nearly every domain host you might use and will make this as seamless as possible.
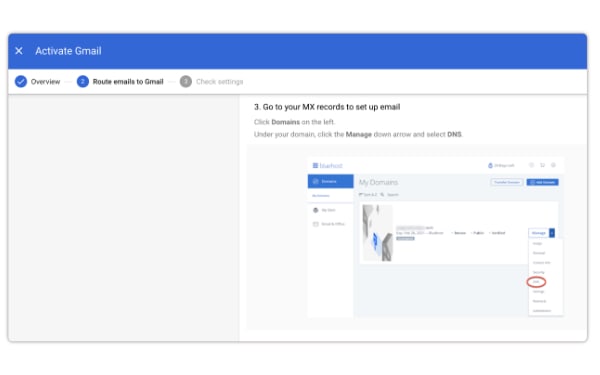
Because you can only route your emails to one server, you’ll need to delete the old MX record before the new one takes effect.
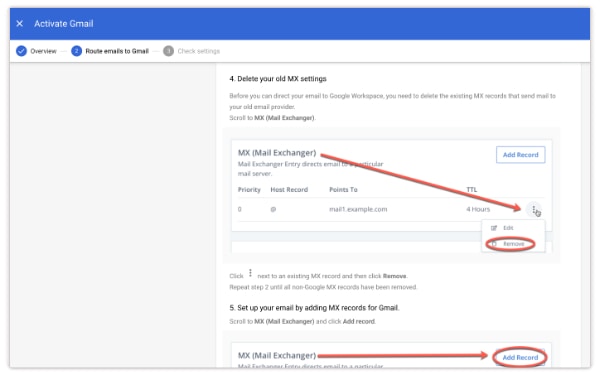
Once your old record is deleted, and your new MX record is in place, you’ll need to activate Google by clicking on a button at the bottom of the screen. This will complete the routing.
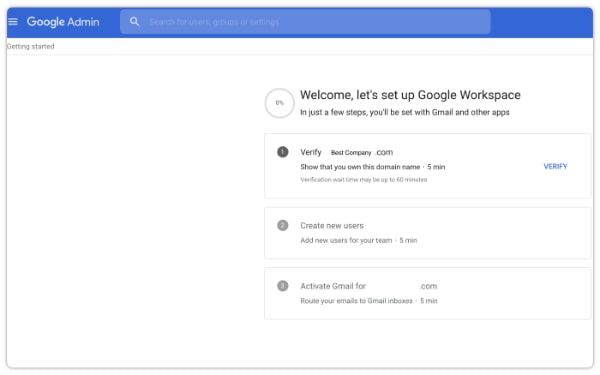
After you’ve finished adding the MX record to your domain host site, you’ll be rerouted back to Google Workspace. If everything has been set up accordingly – and it should be – you’ll receive a success message.
There could be a lag time before your email begins rerouting, and during this time, you may not receive emails. Plan accordingly and complete the set-up process when you can allow a few hours to pass without receiving an email.
Using Your Professional Email
Your professional email will work just like any other Gmail account. You can get to it by visiting Gmail.com and signing in with the Google Workspace professional email address you created.
Any users for whom you created an email will now also have access to all the many tools that Google Workspace provides. You have the ability in the admin center to turn tools on and off according to your business needs.
Why Use Google Workspace?
Now that you see how easy it is to create a professional email using Google Workspace, you may want to know if there are any other options out there. The answer is absolutely. There are many options for creating a professional email address. In fact, you can even find a handful of free email domain providers. However, the best part of using Google Workspace is that it comes with the bonus of gaining access to Google’s full suite of collaboration tools. What’s more, you can share all the tools across teams.
For companies with fewer than 10 employees, the entire collaboration suite is just $6 per person, per month. For that cost, you receive 30 GB of cloud storage, file sharing, email hosting, video conferencing, spam protection, automatic backups, and more.
You can get started with your professional email and test the other tools free for the first two weeks. You can also obtain a promo code for discounted packages on the Business Starter and Business Standard plans.
Next Steps
Once your professional email is all set up, you might start exploring the other features available in Google Workspace or go back to the admin panel to add additional employees or user email addresses. Once those emails are activated, those users will also have access to the full suite of collaboration tools, allowing your entire team to work together and communicate like true professionals.